According to reports from various affected users, they scree a black wallpaper when applying a new Windows 11 theme or desktop background. Sometimes, when they launch the Start menu, the desktop wallpaper turns black automatically. As of now, what causes Windows 11 Displays a Black Wallpaper issue to appear is mysterious. If you are facing it then we have got you covered. In this article, we will be discussing how you can fix Windows 11 displaying black wallpaper.
Try Restarting The File Explorer
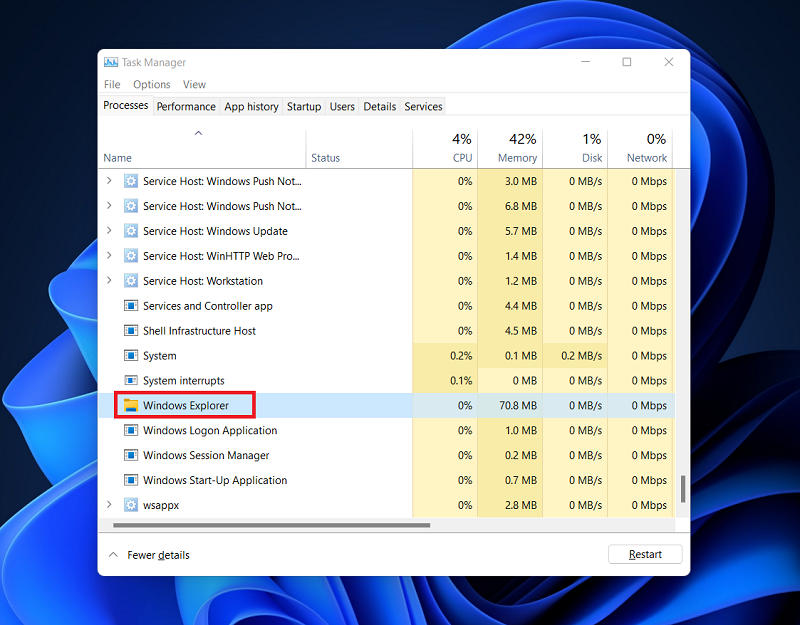
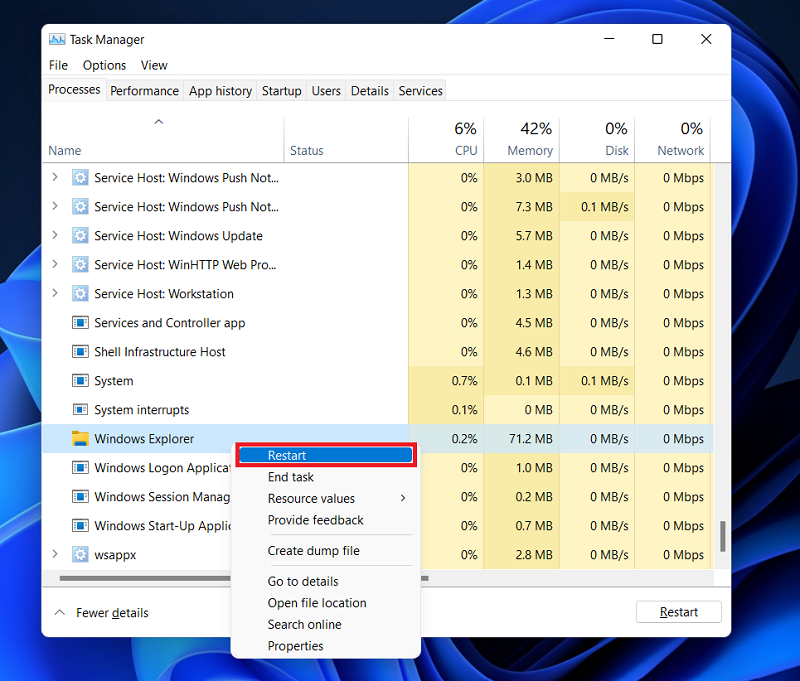
The very first thing that you can try doing is restating the file explorer from the task manager. To do so, follow the steps given below- Press the Ctrl + Shift + Esc key combo. This will open the Task Manager on your PC. Click on More Details in the Task Manager. You will be headed to the Processes tab in the Task Manager. Here, search for Windows Explorer. Select Windows Explorer, right-click on it, and then click on Restart. This will restart the File Explorer. Check if it fixes the issue or not. If you still face the issue, then move to the next troubleshooting step.
Restart Your PC
You may also face this issue due to random bugs, which may be easily fixed by restarting the computer. Try restarting the computer and this should most probably fix the issue for you.
Manually Change The Wallpaper
Another thing that you can do is manually change the wallpaper. To manually change the wallpaper, open the Settings app. To do so, press the Windows + I key combo. In the Settings app, click on the Personalization section from the left sidebar. Now on the right side, click on the Background. From the Recent images, select the image you want to set as wallpaper. You can either click on the Browse photos button and then manually browse for the photo that you want to set as the wallpaper.
Update Graphics Driver
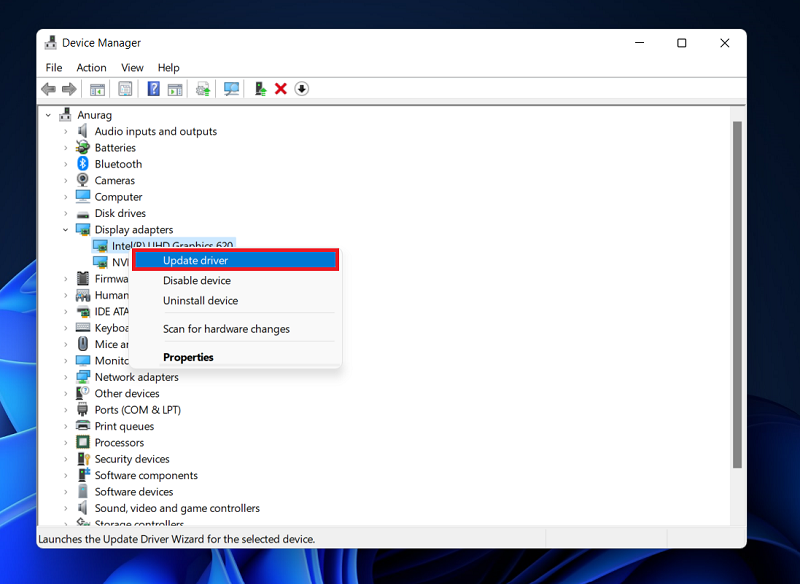
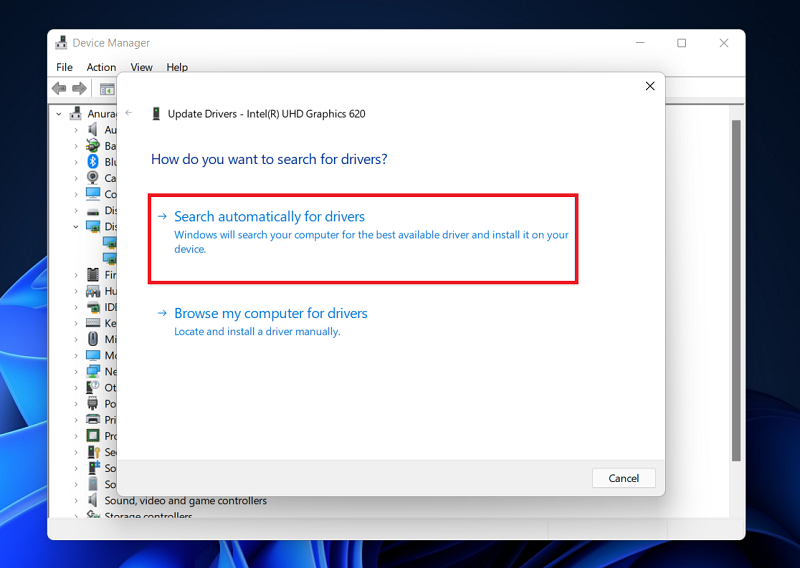
Another thing that you can do is update the graphics driver. You are most likely to face the issue because of an outdated graphics driver. To update the graphics driver, follow the steps given below- Open the Device Manager on your PC. To do so, open the Start Menu, search for Device Manager and click on it. In the Device Manager, expand the Display Adapters tab by double-clicking on it. From the list of graphics drivers that opens up, select your graphics driver. Right-click on it, and then click on Update Driver. On the next window, click on the Search automatically for drivers option to search the driver on the internet. Now, follow the on-screen instructions to update your graphics driver. After the driver has been updated, restart your PC, and the issue will be solved.
Change Setting in Ease of Access
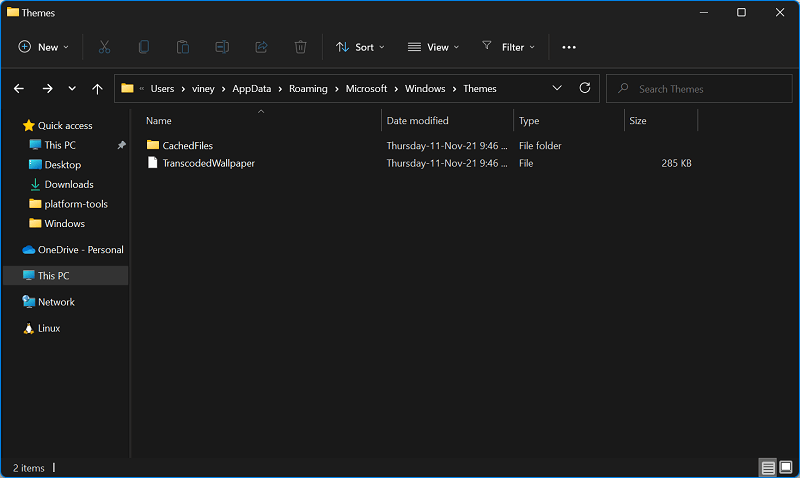
Some users reported that they turn particular settings in Ease of Access settings in the Control Panel and the issue was fixed automatically. Here’s what you need to do: Launch Control Panel and then select Ease of Access. Under ‘Explore all settings‘, select Make the computer easier to use. Here, head over to “Make things on the screen easier to use” and confirm the option “Remove background images (where available)” is unchecked. If it is checked, uncheck it. Corrupt TranscodedWallpaper.jpg File Sometimes corrupt TranscodedWallpaper is the primary cause behind desktop showing black wallpaper instead of the one you have set. Here’s how you can fix that: Launch File Explorer and then copy-paste this: %USERPROFILE%\AppData\Roaming\Microsoft\Windows\Themes\and hit enter. Here, you will find a file called TranscodedWallpaper, rename it to TranscodedWallpaper.old. Apart from that, if you see Slideshow.ini file, then open it with Notepad, delete all the content in that file and save it. After that, close everything and try to set the desktop background of your choice. In case, nothing suggested fails to fix the issue, then I suggest you should perform an in-place upgrade of Windows 11. It’s a magical solution to fix almost all the issues related to Windows 11 issues. If you are facing black wallpaper automatically getting applied to your PC issue in Windows 11, then this article will help you solve that. Although, if you came to know about any solution that helped you in fixing the issue, then don’t hesitate to share it in the comments.
