When you create a google account, it gives you access to various useful features, apps, and services. One of the favorite features is Google Docs. It is a part of Google’s service called Google Drive. With the help of Google Docs, you can create new documents, and edit them whenever and from wherever you want. As it is part of Google’s web-based office suite, it offers you all the features and functionalities which an idea office suite must-have. Guess what? You can also create brochures using Google Docs. Most of the users take help of Microsoft office suite to create brochures. But if you spent most of the time on the internet and collaborated with your team members via the cloud, then Google Docs is must better option to create brochures.
How to Make a Brochure on Google Docs
Lots of users already know this but don’t to how to make a brochure on Google Docs for themselves using Google Docs. To help those users I decided to cover this post. It has step by step instructions on how to do that. So without further delay why don’t you start reading about it: Note: In the following post, I’m going to use the Brochure template to create Brochure on Google Docs.
- First of all, you need to visit this page ‘https://docs.google.com.’ If you’re already logged in you will see the following page: If not, the Google login page will appear where you need to enter your account credentials to log in. In case, you have no Google account create one.
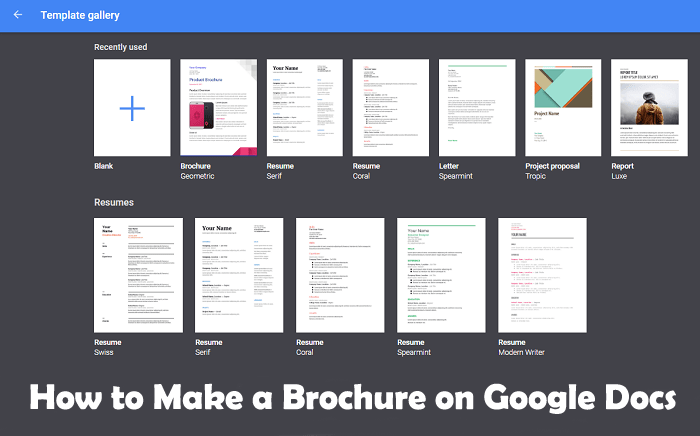
- By default under ‘Start a new document,’ you will see a ‘Geometric Brochure‘ template. In case, you want to check more brochure templates in Google Docs; then you need to click ‘up and down arrows‘ next to ‘Template gallery‘ available on the top right side. This will show you a list of various templates available on Google Docs. You need to scroll down to Work section where you will find more Brochure templates. As of writing this article, it has one more brochure template named ‘Modern Writer‘ accompanied by ‘Geometric.’
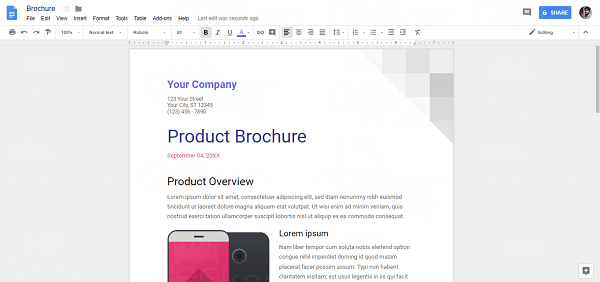
- You need to select any of the brochure templates to continue the process of creating a brochure in Google Docs. Once you choose the template of your choice it will open it in Google Docs editor, just as shown in the following screenshot:
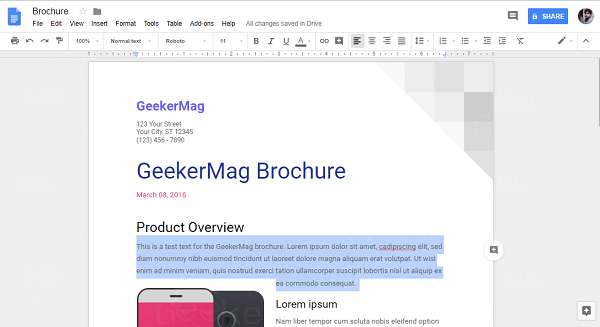
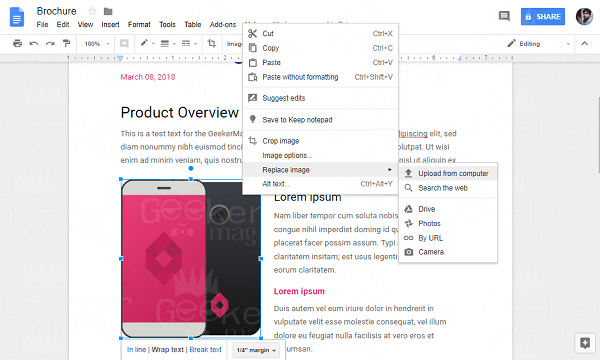
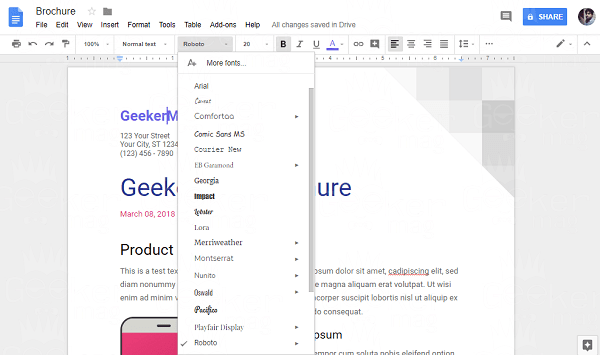
- Now you can change further changes into Brochure like: Replace text in the brochure To replace the text in the brochure, you need to select the text area and then copy-paste or write the new content. Replace the Image in a Brochure By default the brochure template has images. In case, you also want to replace those images with a new one; then you can also do that. Here is how to do: Right-click on the already uploaded image and select ‘Replace image‘ -> ‘Upload from the computer.’ This will open the browser window, just navigate to the location of the image and open it. You can also resize the image which fits perfect. Reformat texts in the brochure In case, you want to make formatting changes in the text of brochure-like making heading biggers, use a different color, different fonts and more then you can also do that. You can take the help of the features available on the top bar of the Google Docs text editor.
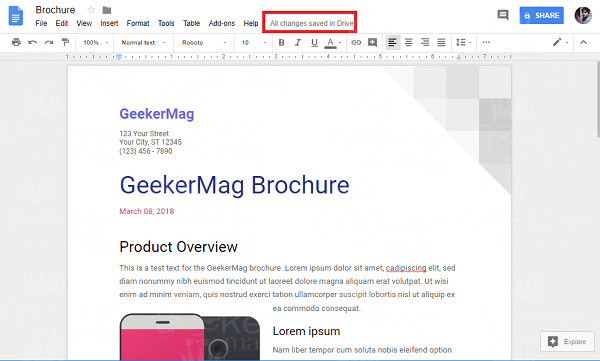
- Once you’re done with adding all the content in the Brochure, you need to save it. Like other editors, there is no option available on Google Docs to do the same. As the Google Docs text editor automatically saved documents in a little span of time. To check if final changes are saved, look for the phrase which reads ‘All changes saved in Drive.’ If the same appear at the top bar, you’re safe to exit the comment.
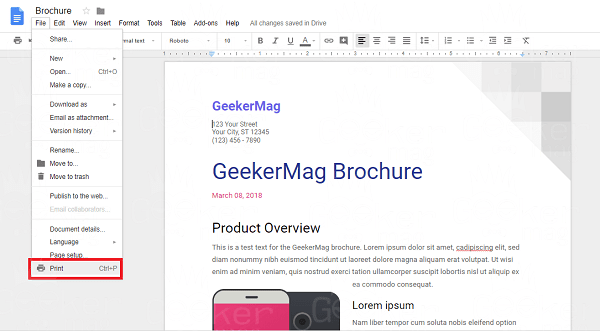
- Once done, you want to take print of the brochure which you created using the steps discussed above. Right? Here is how you can do that: Click on the File -> Print Setup. You can also use keyboard shortcut CTRL + P (Windows PC) and Command + P (Mac). This will open the Printer setting page make the setting that fits your requirements and at last click on the Print button. We hope you find this tutorial on How to Make a Brochure on Google Docs useful. Let me know your thoughts in the comment sections.
