It is one of the best antivirus programs available for Windows 11 and in the presence of this security app there’s no need to install the third-party program as it ensures the overall security of your device. Some users want to disable Windows Defender in Windows 11 for personal reasons. Usually, when users install a third-party antivirus program on Windows 11 PC, the Windows Security app is disabled automatically. Sometimes users want to disable Windows Defender manually and the most common reason is that they want to install a particular program that the Windows Security app doesn’t allow to install. It is possible that there could be other reasons as well, let us know in the comments.
Use Settings app to Disable Windows Defender in Windows 11 PC
No matter what is your reason behind disabling Windows (Defender) Security app in Windows 11, below in this blog post, you will learn step by step instructions on how to do that: Before you start following the steps, keep a few things in mind:
You must be logged in to Windows 11 PC using an administrator accountYou won’t be able to perform Periodic Scanning in Windows 11 when Windows Defender is disabled.You need to turn off Tamper protection in Windows 11 to disable Windows Defender. Also, you need to turn on Tamper protection, when you want to enable Windows Defender
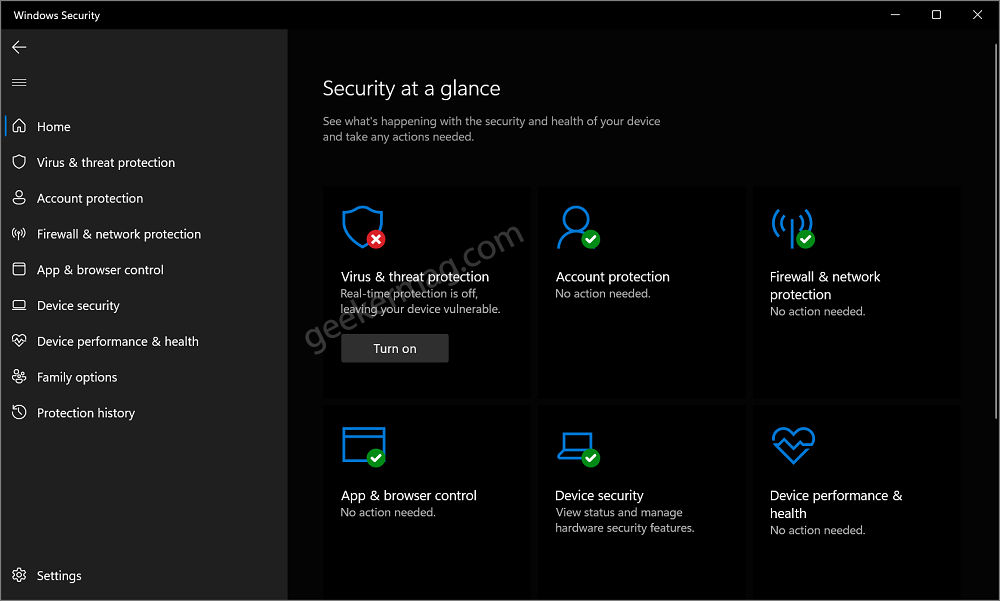
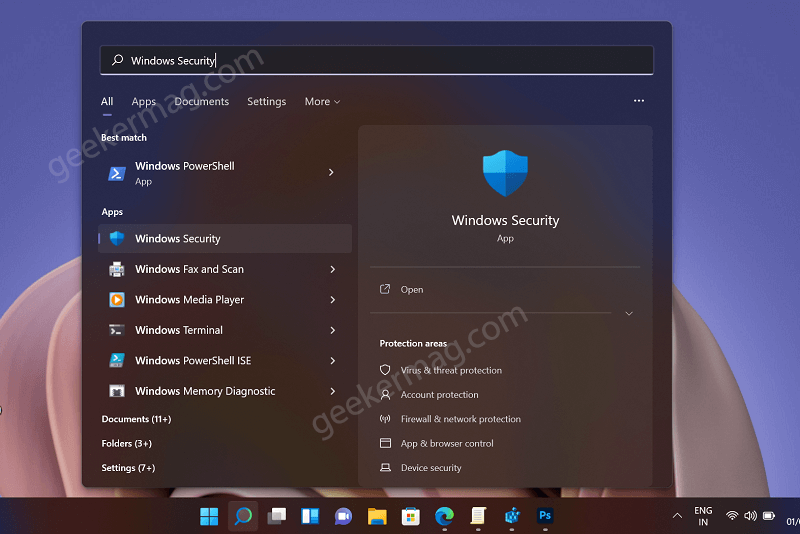
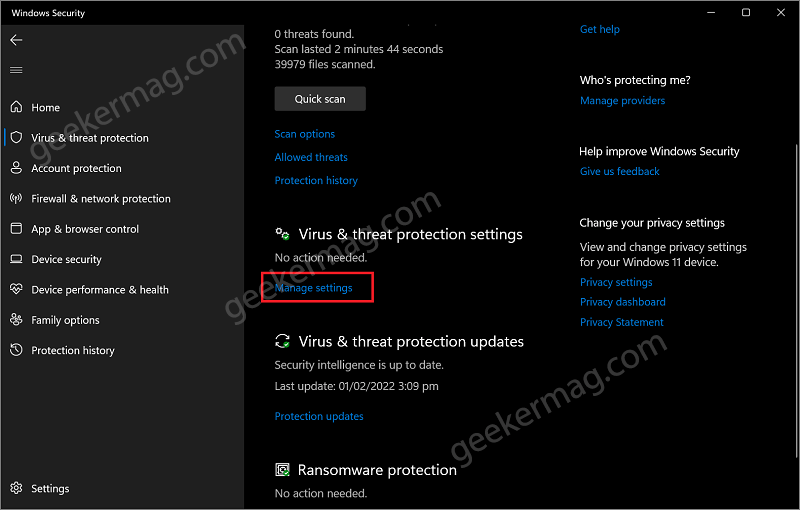
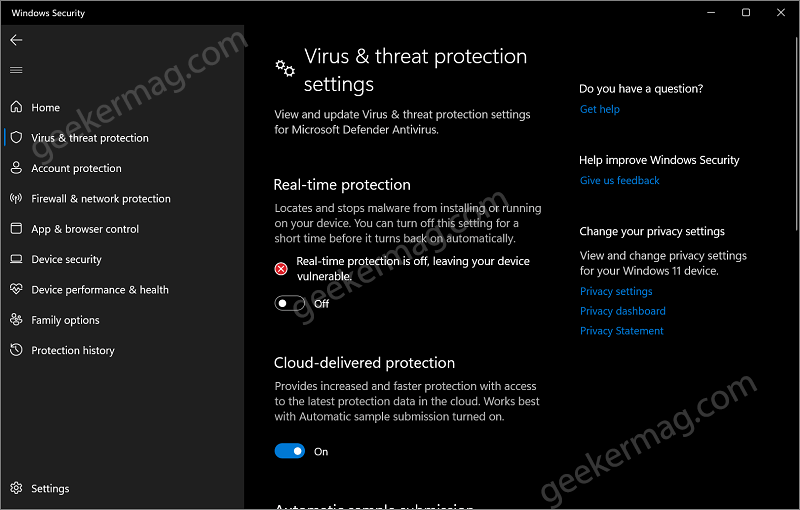
Now that you’re aware of facts and consequences, let’s get started: Click on the Search icon available on the taskbar and type Windows Security, when it appears in results click to open it. In the Windows Security app, either switch to Virus and threat protection tab or click on the Same option listed under Security at glance on the right side. On the right side, scroll down to Virus and threat protection settings section and click on the Manage setting option Here, you need to turn off the option for “Real-time protection“, when the UAC dialog box appears, click Yes to continue. Once done, the status under Real-time protection will be changed to “Real-time protection is off, your device is vulnerable“. The steps discussed above will only turn off the Real-time protection of Windows Defender and not disable the application itself. In case, you want to disable the Windows Defender app in Windows 11 permanently, then you can use the following methods:
Use Group Policy Manager to Disable Windows Defender in Windows 11
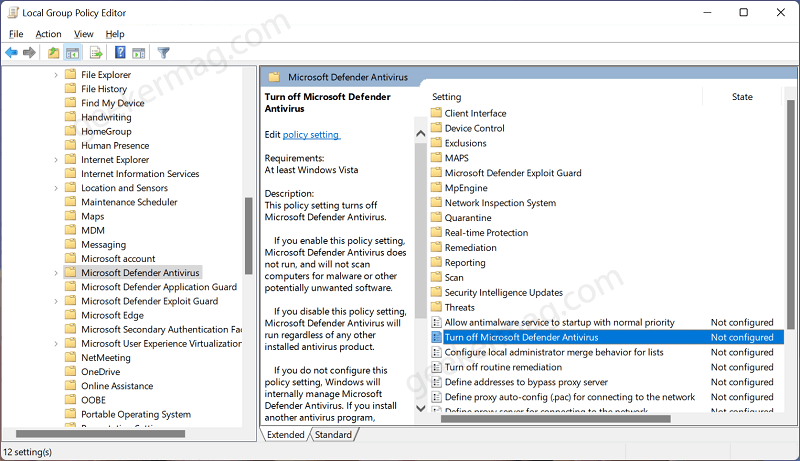
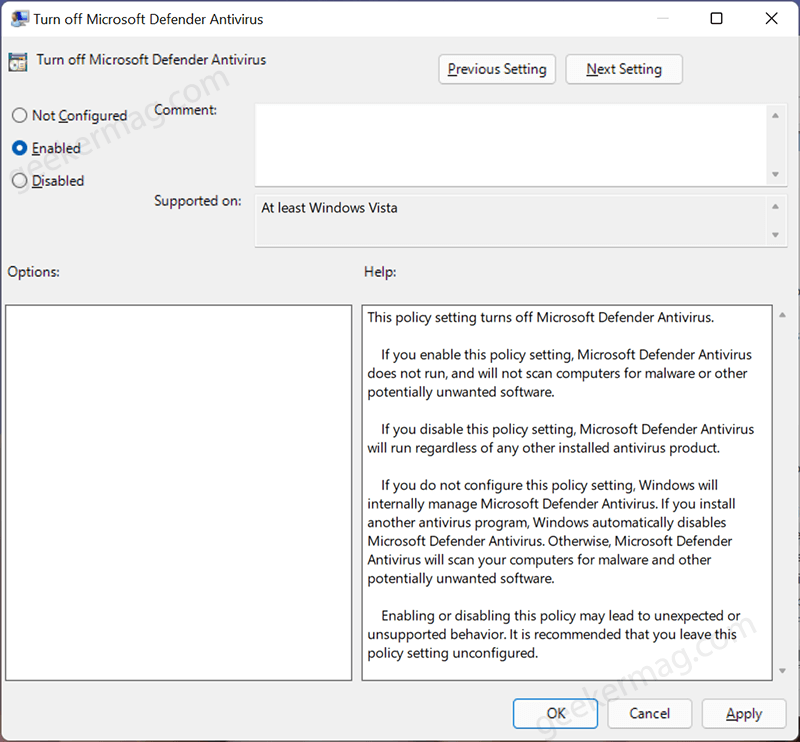
Note – The method works for users running Windows 11 Pro edition on the PC Click on the Search icon and type ‘gpedit.msc‘ and when the “Edit group policy” option appears in results, click to open it. In the Group Policy Editor, you need to head over to the following policy location: Computer Configuration > Administrative Templates > Windows Components > Microsoft Defender Antivirus. On the right side, you need to locate and double-click on “Turn off Microsoft Defender Antivirus“. In the next window, you need to select the Enabled option. After that, click Apply and OK. Restart your computer to apply the changes. At any point, you want to enable Windows Defender, then select the Not Configured option.
Use Registry Editor to Disable Windows Defender in Windows 11
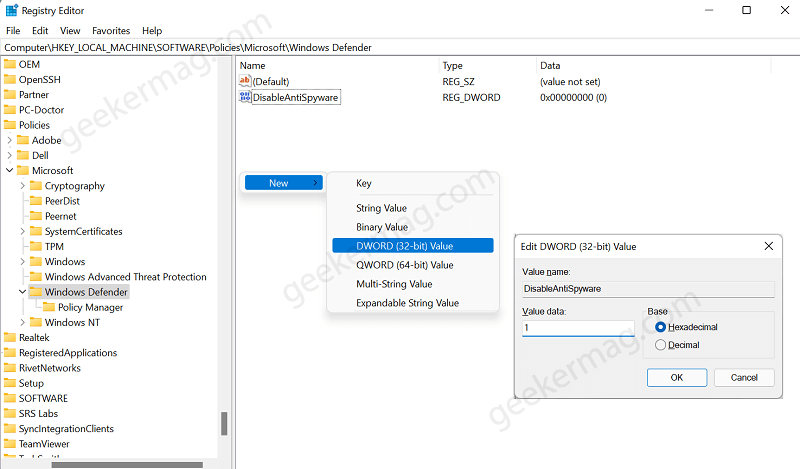
Note – The method works for users running Windows 11 Pro and Home edition on the PC Click on the Search icon and then type regedit, when Registry editor appears in search results, click to open it. When the UAC dialog box appears, click Yes to continue. In the Registry Editor, you need to navigate to the following key locations: HKEY_LOCAL_MACHINE\SOFTWARE\Policies\Microsoft\Windows Defender Here on the right side, right-click and select New > DWORD (32-bit) Value and name it “DisableAntiSpyware” Double-click on the same DWORD value and set its Value data to 1. Restart your computer to apply the changes. At any point, you want to turn on Windows Defender, then you need to delete the same DWORD value. I hope this helps! Why don’t you try the method discussed above and let us know which one you used? Also, let us know why you want to disable Windows Defender Security on Windows 11 PC.
