It also shows you recently accessed files and folders. Overall, a convenient feature for advanced and regular Windows users. But things were not so good before. Quick Access is a recent addition. So let us show you how to enable and use it to your advantage.
Enable Quick Access in Windows 11
Quick Access was not available on the older version of the Windows OS. There was a similar feature available named Favorites. It wasn’t as efficient, but it was the only version available at that moment. Quick Access was introduced with Windows 10. But the feature was disabled by default. So, users had to enable it manually from File Explorer, but it was not a difficult task. Now Quick Access is a directory on the File Explorer app in Windows 11. It is designed to provide users with a list of recently or frequently opened files and folders. In order to help them navigate easily. On Windows 11, you don’t have to enable it. It is integrated into the system, but you have the option to disable it if you are not fond of the feature.
Disable Quick Access in Windows 11
If you hate the idea of a Quick Access menu, you can remove it entirely from File Explorer. For that, you’ll need to modify the registry files on Windows. Here’s how to do it. Caution: The Registry files are an integral part of Windows, and messing them up will have severe consequences. So, it is better if you back up the registry files before deciding to make any changes.
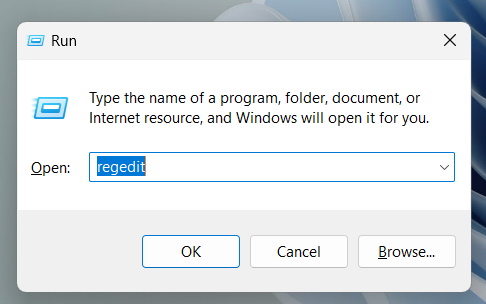
- Press the Win + R keys on the keyboard to launch the RUN dialogue box.
- In the dialogue box, type regedit and hit Enter.
- Go to the following key. You can use the address bar on top for navigation.
- Now, right-click on any space on the right side of the window, and select New.
- Choose the DWORD (32-bit) Value and name it HubMode.
- Double-click the recently created DWORD and change its value to 1. We are almost done. Restart your computer, and Quick Access will disappear from File Explorer. You do have the option to enable it again. Just go through the same steps and delete the HubMode entry.
Use Quick Access in Windows 11
Most users think of Quick Access as a rigid built-in feature that is useful most of the time, but occasionally annoying. What users are unaware of is the fact that Quick Access in Windows 11 is customizable. You can pin/unpin files and folders of your choice, set it to not display your recently accessed files, and you can also reset it if you have made too many unfortunate choices.
Pin/Unpin Files and Folders in Windows 11
Now, you have arrived at the biggest reason users either love or hate the File Manager Quick Access menu in Windows 11. On Windows 11, you are greeted with Quick Access when you open File Explorer. It displays the 10 most used folders and 20 recently accessed files. It seems pretty handy, but some people don’t like displaying what they are accessing on their computers. The problem is obvious on work computers. That said, you have the option to customize Quick Access. You can pin a few of your favourite folders to access them quickly. Here’s how.
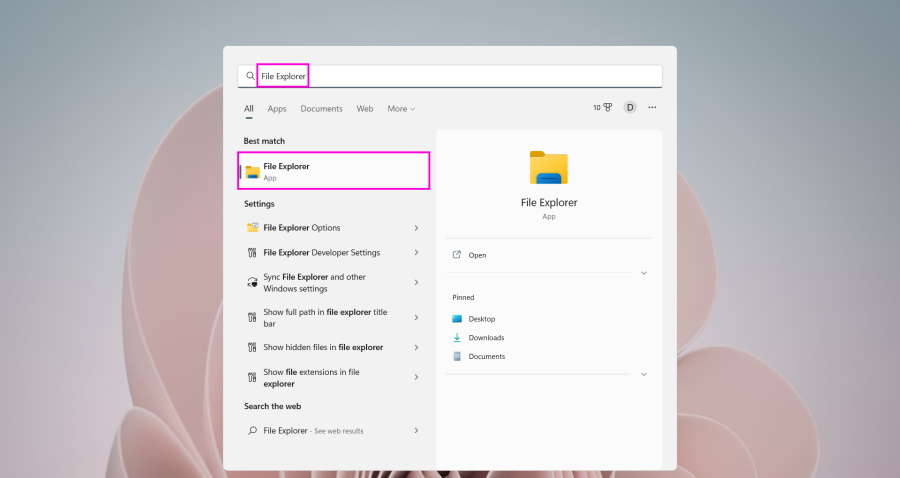
- Open the Start menu and type File Explorer.
- Hit Enter. You can also do the same by pressing Win + R keys on the keyboard.
- Now, go to the folder that you want to add to Quick Access. Right-click on the folder and choose the Pin to Quick Access option. The folder will be pinned to Quick Access. If you want to unpin a folder from Quick Access, right-click on the folder under Quick Access, and select Unpin from Quick access. You can do the same if you want to remove a recent file from Quick Access. Right-click on the file and select Unpin from Quick Access.
Prevent Quick Access from Showing Recent Files and Folders
If you don’t want to display your recently used files and folder on Quick Access, use the following steps. A lot of people don’t like to show which files they have accessed; especially on a work computer. There’s a way to prevent Quick Access from doing so. The steps are as follows.
- Press the Win + E keys on your keyboard to launch File Explorer.
- Click the Three-Dots Sign to open the menu.
- Choose Options from the list.
- In the Folder Options panel, go to the General tab.
- Under Privacy, uncheck the boxes beside Show recently used files and Show frequently used folders options.
- After unchecking the boxes, click Apply and then OK. After executing these steps, Quick Access will only show you the pinned folders. You don’t have to worry about Quick Access showing recent files and folders anymore.
Reset Quick Access in Windows 11
If you are still not satisfied, you can always reset the Quick Access on Windows 11. Most people make a mess of the Quick Access folder by pinning too many files and folders. But you can always start again from the scratch by resetting Quick Access. You also have to clear the Recent Files history in Quick Access. You also have to use the Command Prompt with Administrator privilege on Windows to reset; here’s how to do it.
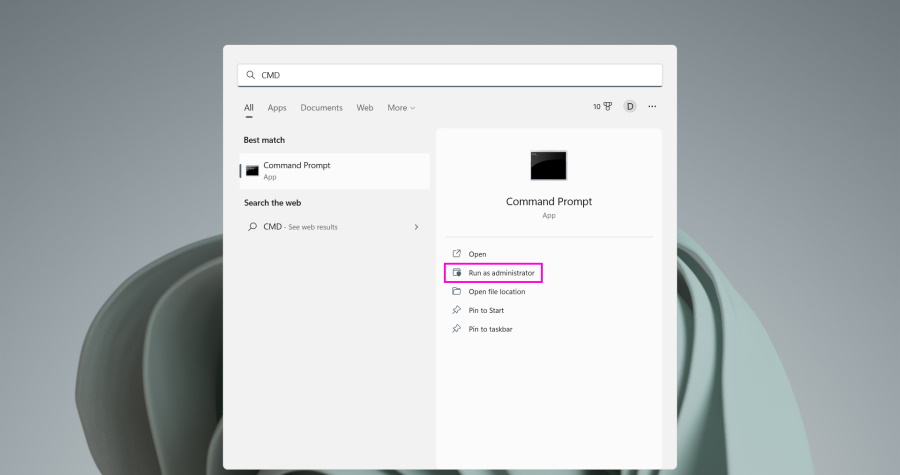
- Click the Start button on the desktop.
- Type CMD and click the Run As Administrator option.
- Now, type and execute the following commands one by one. This is it. Your work is done. Quick Access on Windows 11 reset is complete. But this isn’t the end. You still have to erase the history. File Explorer does not have the option to reset Quick Access, but it does have the option for clearing history. So, if you want to do it, here’s how to access it.
- Launch File Explorer and click the Three-Dot Sign on the top.
- It will open the Folder Options.
- Look for the Privacy option.
- Click the Clear button under Privacy to erase Quick Access history. Now, you can start from scratch. Quick Access reset was successful, and its history has also been erased.
Summing Up
Therefore, these are ways to use Quick Access in Windows 11 to your advantage. If your work is centred around File Explorer, then Quick Access can be very handy. It can help to open files and folders quickly and efficiently. Most people try to pin all the files and folders to it and make a mess. Do not do it. Only pin the essential files and folders. But if you are not a fan of it, you can always disable it as we have discussed in the article.
Also Read: How to Install and Use Microsoft PC Manager on Windows 11/10


