Out of the box Transparency effect is enabled in Windows 11, but some users might want to disable it. There could be various reasons for doing so and one out of them is that it eat up lots of system resources.
Enable and Disable Transparency Effects in Windows 11
No matter what brings you on this page, we will share you instructions different ways on how to enable and disable the transparency effect in Windows 11 using different methods. Let’s start with first one:
Use Settings app to Enable and Disable Transparency Effects in Windows 11
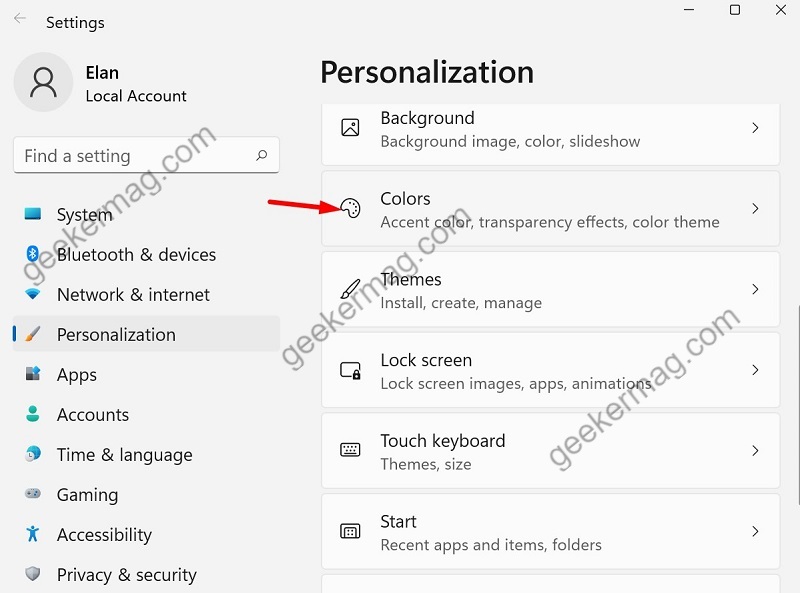
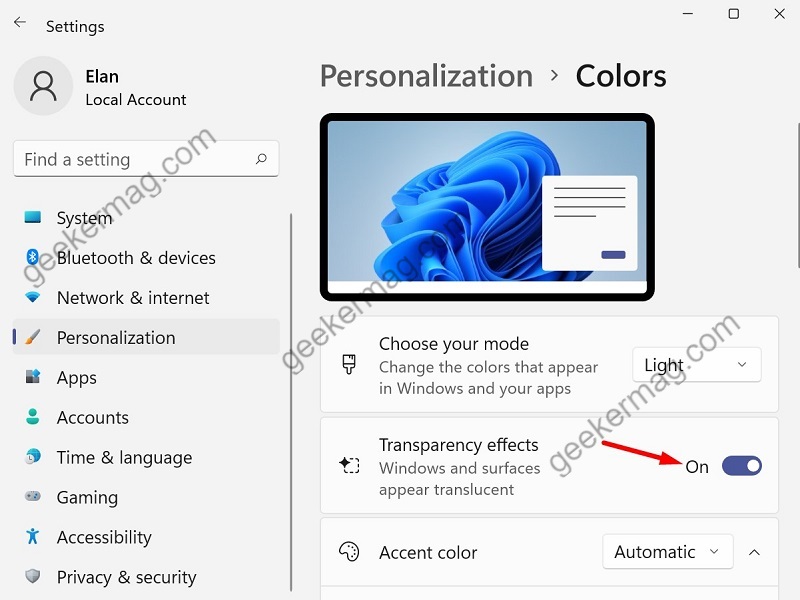
Right-click on the desktop and then choose Personalize option from the context menu. In the Personalization settings page, click Colors options in the right sidebar. Here, locate “Transparency effects” and turn it OFF or ON depending on your requirements. The changes made by you will be applied instantly.
Turn On or Off Transparency Effects in Accessibility Settings
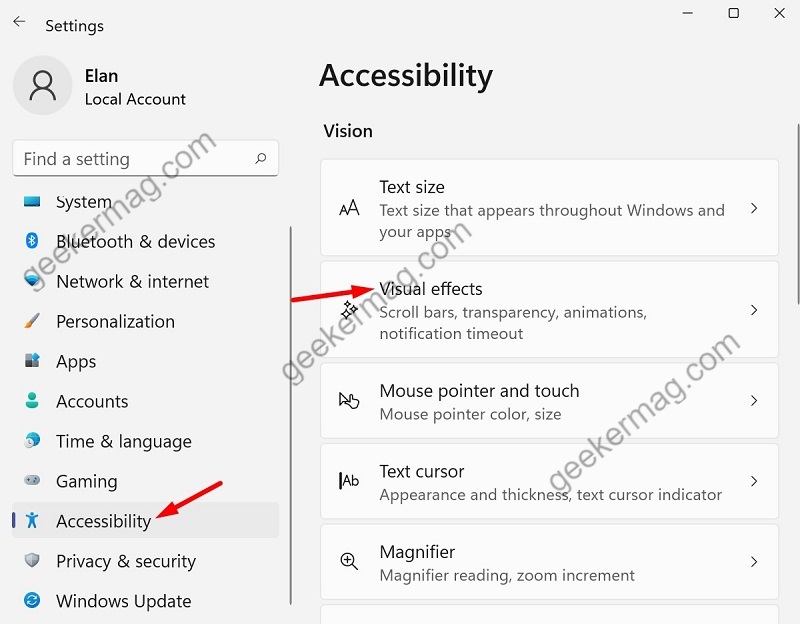
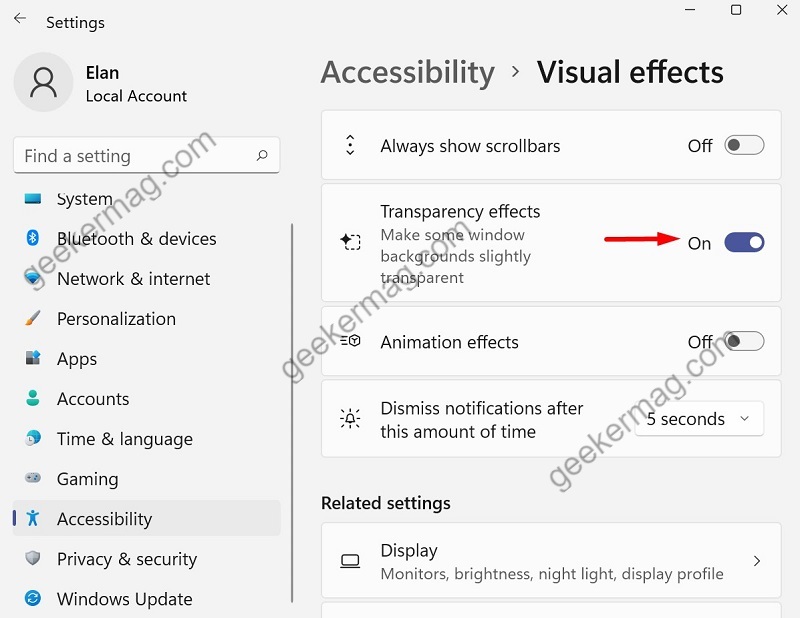
Open Windows 11 Settings using Windows + I keys on your keyboard. Go to the Accessibility option in the left sidebar and click on Visual Effects in the right sidebar. Scroll down and find Transparency effects and turn it OFF. If you want to enable transparency effects again, follow the same steps and turn on the switch.
Use Registry Editor to turn off or on Transparency Effects
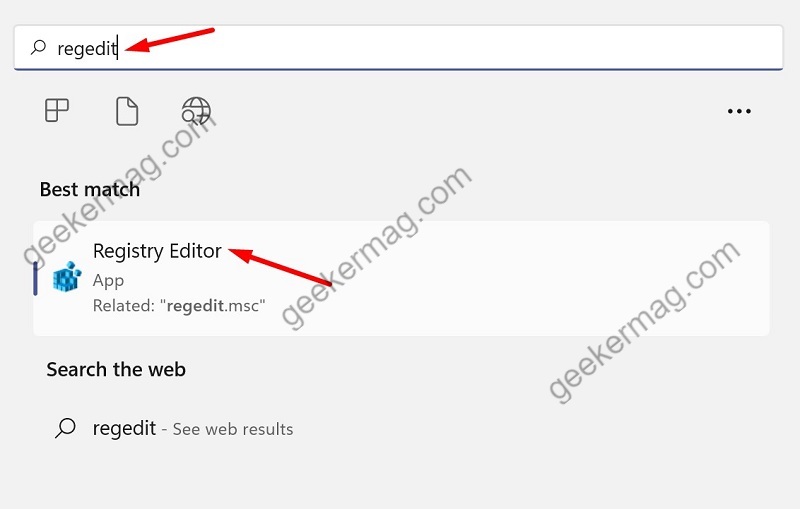
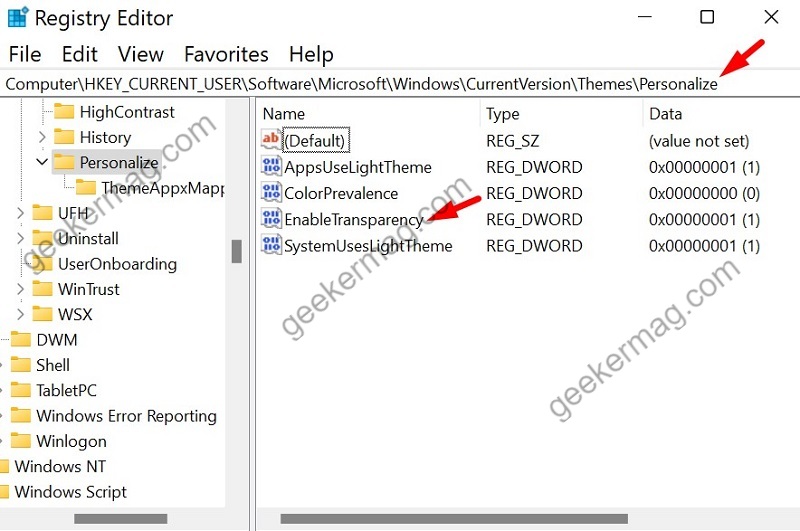
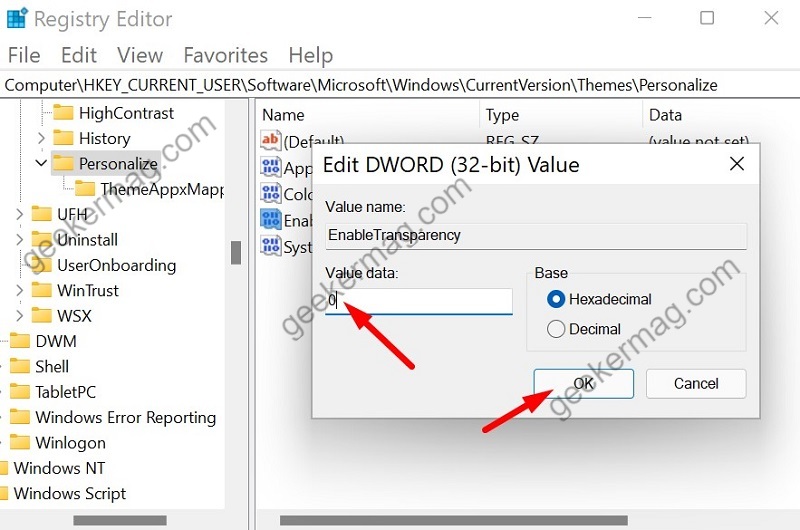
Open the start menu and type regedit and when it appear in search results, click to open it. In the registry editor, navigate to this path: HKEY_CURRENT_USER\Software\Microsoft\Windows\CurrentVersion\Themes\Personalize Find the EnableTransparency key in the right sidebar. Double click on ‘EnableTransparency‘ and set it Value data from 1 to 0 to disable the transparency effect on your Windows 11. Close Registry Editor and restart your computer to apply the changes. To Enable Transparency effect in Windows 11 using registry editor, just change the Value data from 0 to 1. So these are three ways using which you can either turn off or on Windows 11 transparency effect. Let us know in the comments, whether you enable or disable it in the comments.
